Objects Tutorial
Things you will need:
- The Sims
- The Sims Transmogrifier (AKA the T-mog)
- A Paint Program (I use Fractal Design's Painter 5-- you can use whatever you like. Paintshop Pro, Adobe Photoshop, or the program of your choice.)
- A source for pictures of your new objects... this can be photographs, or images you rendered out from a 3-D program like Milkshape or 3-D Studio Max. or even images you paint by hand if you are that good.
- How to use the T-mog (there is already a good tutorial on the T-mog home page)
How to use your paint program.
Getting ready:
- First, you'll want to prepare
your images for editing. You need A) the original sprites, and B) some
new source material.
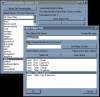
- Make sure that when you export the sprites, you check off one zoom all channels, und UNCHECK shrinkwrap images and UNCHECK compress bitmaps
-
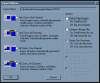
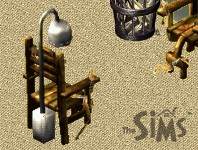
For this example, we are
going to make a new lamp out of this one

Let's clone the lamp.
Now we've got a series of sprites to play with.
 Now,
we want to get out source material. I found this picture of a nice little
stained glass lamp.
Now,
we want to get out source material. I found this picture of a nice little
stained glass lamp.
Ok, now that we've got all
our pictures ready, let's open up our paint program...
Editing the images
First, shrink your picture down until it's about the size of the one in the Sims. Then, paint out the background with the same yellow as in the background of the original sprite. Make sure your program does not anti-alias (fuzz out) the edges, you want them nice and sharp and pixelly.
Then you want to paste your picture right on top of the one in the sprite. You want to line it up fairly well to the original, although as long as it is generally near the bottom & not touching the edges it should be fine. Paint over any part of the old lamp that sticks through.

Now, for this example we are using a lamp, and as you can see in the sprites, the lamp has a (very!) simple animation of 2 frames... "on" and "off." Using your paint program, select the lamp (making sure you don't effect the background!) and use a lighten tool or filter to make the "on"
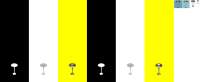
Ok, the lamp itself is painted, now for the alpha and z channel sprites...
Start by making a couple of copies of the lamp. Use your paint program to select the outline of the lamp in one, and paint the image white with a black background for the alpha channel (for this you want to anti-alias the edge between the black/white, so that it is smooth and not jaggy)

Now do it again for the z buffer. This time, make the background white, and the lamp grey. To get the proper shade of grey, pick out the grey in the original Sims sprite. It will be a gentle gradient, you can pick the darkest and lightest parts to make a gradient fill yourself, although I have found that for small simple objects like the lamp, a single flat shade will do.Ready to Transmogrify!
If you are doing a more complicated object (like a chair) where when the Sim interacts, some parts appear behind him, and some parts in front of him (like chair arms or refridgerator doors) you have to be more careful about getting the grey gradient right.
You will notice in the sprites you exported from the T-mog, both the "on" lamp and the "off" lamp have their own alpha and z sprites. In this example the lamp doesn't actually change shape from on to off, so instead of repeating the steps adove for the "off" sprites, I am just going to copy the ones I just did.
Ok, you've got the images edited. For the old version of the T-mog, you needed to save them as 256 colors instead of full color. But as long as you have the latest version, you can save the images as full color bitmaps (.bmp) But please remember, the A and Z sprites need to be GREYSCALE when you save them!Use the T-mog to import the pictures back in again. When you view the object, you'll see that you have the option to move the lamp up and down or sideways. Unless your orignal image was exactly the same size already, you can use this to center the lamp so it is right in the middle. (Remember you have to do this for ALL views in ALL sizes if it is off center.)
Voila! You now have a new object to buy next time you start up the Sims!
![]()
![]()
![]()
Using 3-D programs as a source of images?
In this example above I have used a photographic source to make the object, but if you have a 3-d program, the principal is exactly the same! Just set up your program to render the object you've made in that isometric, 45 degree angle that your Sims see the world in, and use that instead of the photo!
For example, this object
I had originally made for Quake 3
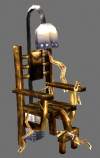
I rendered at this angle...
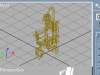
Got this...
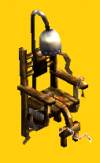
And T-mogged it into this!
Unfortunately, even though I created it as an electric chair, the Sims will only react to it like a regular chair, sitting down and relaxing. Remember, we are just transforming original categories of objects, we can't make new actions. Makes cool dungeon decoration anyway, though!
There is no exportingfor 3-D programs, so you have to plunk the sprites in by hand, and you have to guess the alignment by eye, but if you place them on top of an original object, it's not too hard to fiddle around and get the placement right. Hopefully someday soon, Bil Simser will finish up Blueprint, or Maxis will let us all have Edith!
Well, I hope that you found this useful, and can use it for inspiration for going on to create many new objects!